Wibble: Day 1
What We Are Building
Spellcast is a match-three style game, but instead of matching colored tiles, you are connecting letters into words to score points. You form a word by clicking on a letter, then dragging your cursor to a neighboring letter, forming a connection between them. Dragging your cursor to another neighboring letter forms a three-letter long word, and you can chain as many letters together as you want - but if they don’t form a valid word, you don’t get any points. The point value of a word is the sum of the point value for each letter.
The board of Spellcast is a five-by-five grid, with each grid cell containing a random letter. That letter has a points value, the same value a letter would have in Scrabble (less common letters are worth more points than more common letters). Letters used to form a word are removed from the board and replaced with more random letters.
Spellcast is played in five rounds, with larger point modifiers added each round. A point modifier is attached to a letter, and either affects the point value of the letter or the point value of the whole word. There are three modifiers: double word, double letter, and triple letter. Double multiples the total points value of a word by two. The double and triple letter modifiers multiply the point value of a single letter by two and three, respectively.
My Chosen Constraints
Wibble must be built with the following technologies:
TypeScript
Next.js
React
Additionally, I want to use as much native React functionality as possible.
Day One Progress
Created a Mock-Up in Figma
Figma is still a new tool for me, and to give myself some practice, I made the mock-up in Figma:
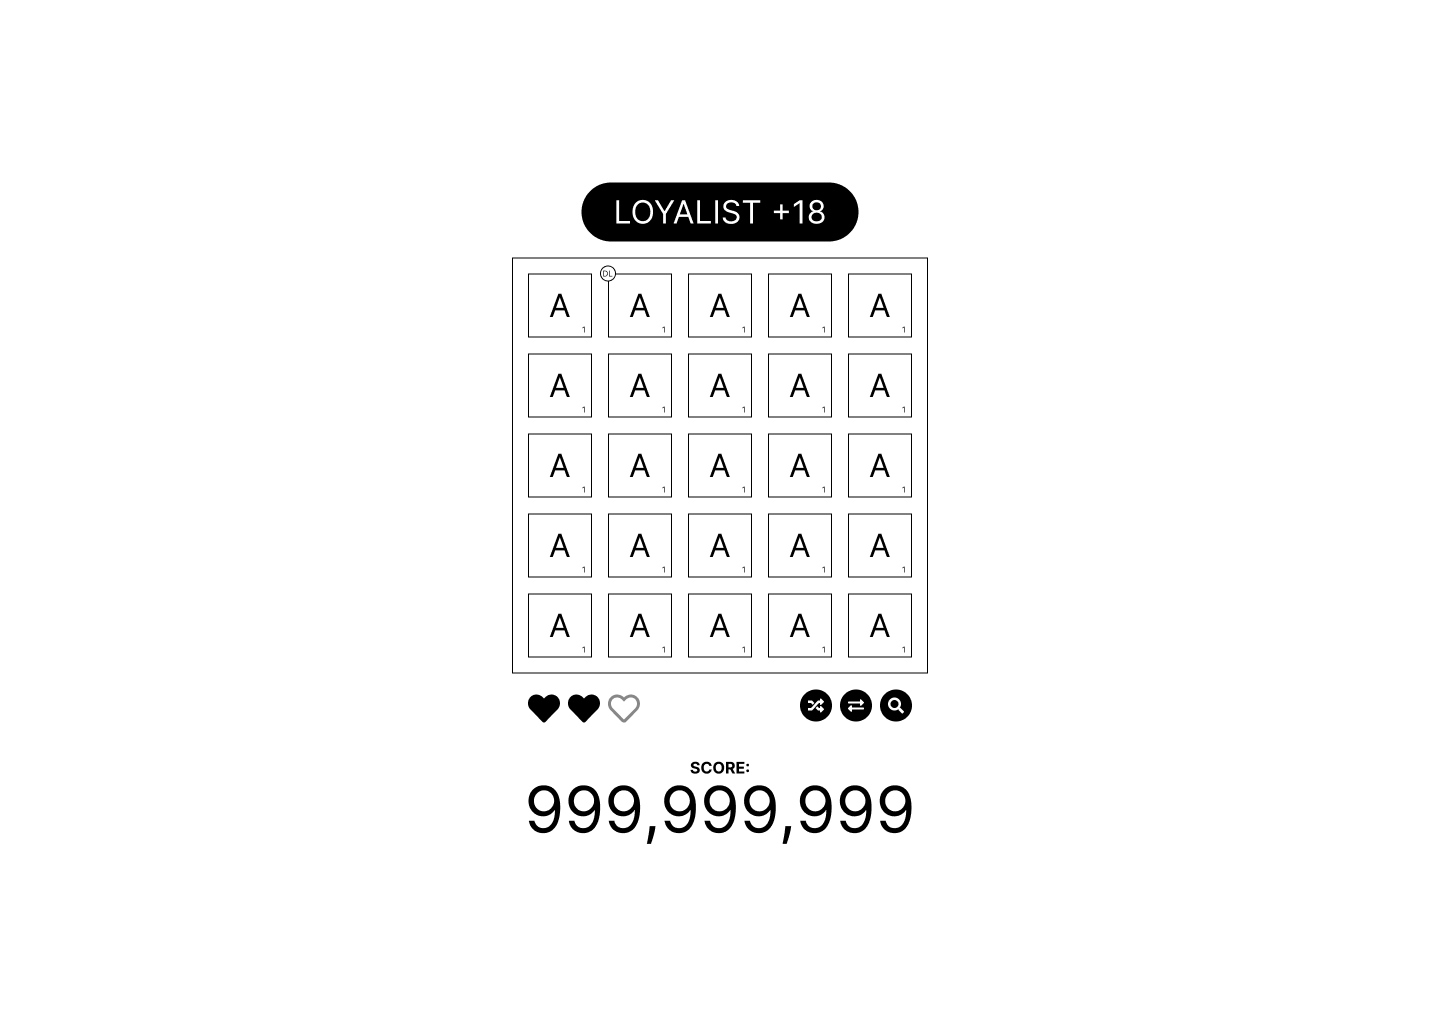
This is very barebones, aesthetically speaking, but it gives me an idea of how to structure my React application. For instance, I made components for the letter tiles and the rows to get the grid layout. Additionally, I made components for the hearts and action buttons below the grid.
Setup the Project
I should have used the create-next-app command to create the project, but I installed it manually, according to their documentation. After that, I created a simple “Hello, World” index page and set up a custom _app.tsx so that I could load reset.css.
Implemented a Randomly Generated Grid of Letters
I won’t go through my entire process for creating this, as it was pretty straightforward. For those interested in a running example, you can check it out at this Vercel instance: https://wibble-day-1.vercel.app/. The code can also be found at this GitHub link.
Began Working Out How to Chain Letters
This is the meat of the game and also the biggest challenge. While appending letters to a string isn’t hard when the user clicks on the tiles in sequence, that’s not what I want. To mimic Spellcraft, I need to replicate the specific interaction of pressing down the left mouse button on a letter. Then, without releasing the left mouse button, I need to drag the cursor over the next desired letter to add it to the word. Even more crucial is how the user can backtrack - when they drag the cursor over the last letter in the chain, that letter is removed.
This seemingly simple interaction is quite complex. The game has two states, “chaining” and “non-chaining.” We always start in the latter, where there are no letters selected. In this mode, we can only click on a letter. Clicking and dragging anywhere other than a letter does nothing. (Unless you clicked on a button.) Once we press the left mouse button down on a letter, we enter the “chaining” state.
While in the “chaining” state, we must keep the left mouse button down. If we release it, we return to the “non-chaining” state. But while we keep the left mouse button down, dragging over another letter adds that letter to the chain, making it selected. Importantly, we can only select letters adjacent to the chain's last letter. Using the scenario above as an example, I cannot drag from ‘R’ to ‘N’ and add ‘N’ to the chain.
The next important feature of chaining is dragging over selected letters to deselect them. First, we can only do this to the last letter of the chain. For instance, when I had backtracked to ‘T’ from ‘E’, I couldn’t bypass ‘I’ and drag over and deselect ‘R’. Watching the recordings closer, I noticed that the last letter in the chain wasn’t removed when the cursor left that letter. Instead, the last letter in the chain was removed when the cursor returned to the second-to-last letter. This is noticeable when the cursor leaves ‘I’ and returns to ‘R’, as the path between them only disappears when the cursor is inside the hitbox for ‘R’.
So, how do I implement this? To move between these states, I would need to:
Have a state flag indicating if we are in “chaining” or “non-chaining” mode.
Change event listeners on all tiles when the state flag changes.
If we are in “non-chaining” mode, tiles will need to listen for a mouse-/pointer-down event and set the state flag to “chaining.”
If we are in “chaining” mode, tiles will need to monitor for mouse-/pointer-enter events.
Have a “current chain” variable that keeps track of the letters currently part of the chain.
Have functions that add letters to and remove letters from the current chain's tail.
Each letter would need to keep track of whether or not it has been selected and where it is in the chain.
The second-to-last letter will have a mouse-/pointer-enter event listener that invokes the function to remove the last letter from the tail of the chain.
A letter would need to react to being removed from the chain by an event not triggered on it and mark itself as unselected.
…
There’s a lot that I might not be thinking of, but the five points here are what come to mind immediately. And they are a lot. Of course, what is obvious is that I have some global state that all components listen to and manipulate in the case of the letters. This gives me some ideas for some state-management solutions:
Use reducers. They are built into React and are designed to help manage the global state that many unrelated components are subscribed to and can freely change.
Reducers benefit from isolating all state changes into one place, making maintenance easy.
Unfortunately, reducers are incredibly verbose and require a lot of boilerplate code to use.
I still have to figure out how to write a state machine using nothing but raw data objects and pure functions.
Zustand. I used Zustand when I was actively developing Repeated Pleasant Games and love it for its simplicity compared to state managed via reducer libraries, such as Redux.
It has the benefit of isolating state changes to a single place, like reducers, but in a much more flexible way without the boilerplate.
Still have to figure out how to implement a state machine using nothing but raw data objects and functions.
Use a state machine library. I know of two of these: State Designer by Steve Ruiz and XState. I haven’t used either before, but their APIs seem nice for what I want to do.
They have the benefit of handling the actual execution of the state machine for me, I just need to define it and the behaviors attached to it.
Never used it before and will have to learn how these libraries interface with React and reactive state management.
As much as I want to use Zustand, it will be more of a headache than it will be worth. It’s been a long time since I used reducers, and I have no intention of resuming working with them again. So I guess I’ll use State Designer or XState to manage the application, which will be interesting.