Wibble: Day 2
When I last left off, I decided that I was going to use a state machine library for handling the state of Wibble. Today I decided which library, State Designer or XState, to use, and implemented the ability to start a game and add letters to the word chain.
Why I Chose XState Over State Designer
When considering the two different state machine libraries that I had found, I had two things on my mind:
I don’t want to pick a library that will make developing Wibble harder than it should be.
I want to pick a technology that is widely used so that I can translate my experience with Wibble to other projects.
And when I considered both libraries, I gravitated to State Designer because it had a simple, straightforward API and easy-to-understand rules. However, there hasn’t been a commit to the project in over two years, and its API was based on the XState API. Additionally, XState is more widely used and adheres to an external standard, SCXML. This isn’t necessarily important for Wibble, but it was enough for me to choose XState over State Designer.
Challenge 1: Where Does the Data Go?
It might sound pretty obvious, but data about the game, such as the contents of the board and the current chain of letters, all went inside the state machine. In XState, you not only define the states of the state machine and what transitions are possible, but you can also define a context. The context can allow the state machine to decide what transition to perform, but it also provides the state machine with data it can manipulate. Using the XState React bindings, we can subscribe to state machine changes, which include context changes, and re-render.
Challenge 2: Implementing the State Machine
The actual states of the state machine are pretty straightforward after having picked apart the features around the chaining feature. We have two predominant states: “chaining” and “non-chaining.” For clarity, I’ll call the “non-chaining” state simply the “idle” state. In XState, the state machine would so far look like this:
createMachine({
	initial: 'idle', // we always start in the 'idle' state.
	states: {
		idle: {},
		chaining: {},
	}
})
Since both the objects defining the “idle” and “chaining” states are empty, if we were to create a diagram of this state machine, it’d look like this:

We need to declare some transitions, but first, I should add the context and then hook everything up to the rest of the rendering code to make sure everything is working as intended:
createMachine({
	initial: 'idle', // we always start in the 'idle' state.
	states: {
		idle: {},
		chaining: {},
	},
	context: {
		currentWord: '',
		board: generateRandomBoard(),
	}
})
And after hooking everything together so we now use the XState state machine to give us a board and current word, we get this:
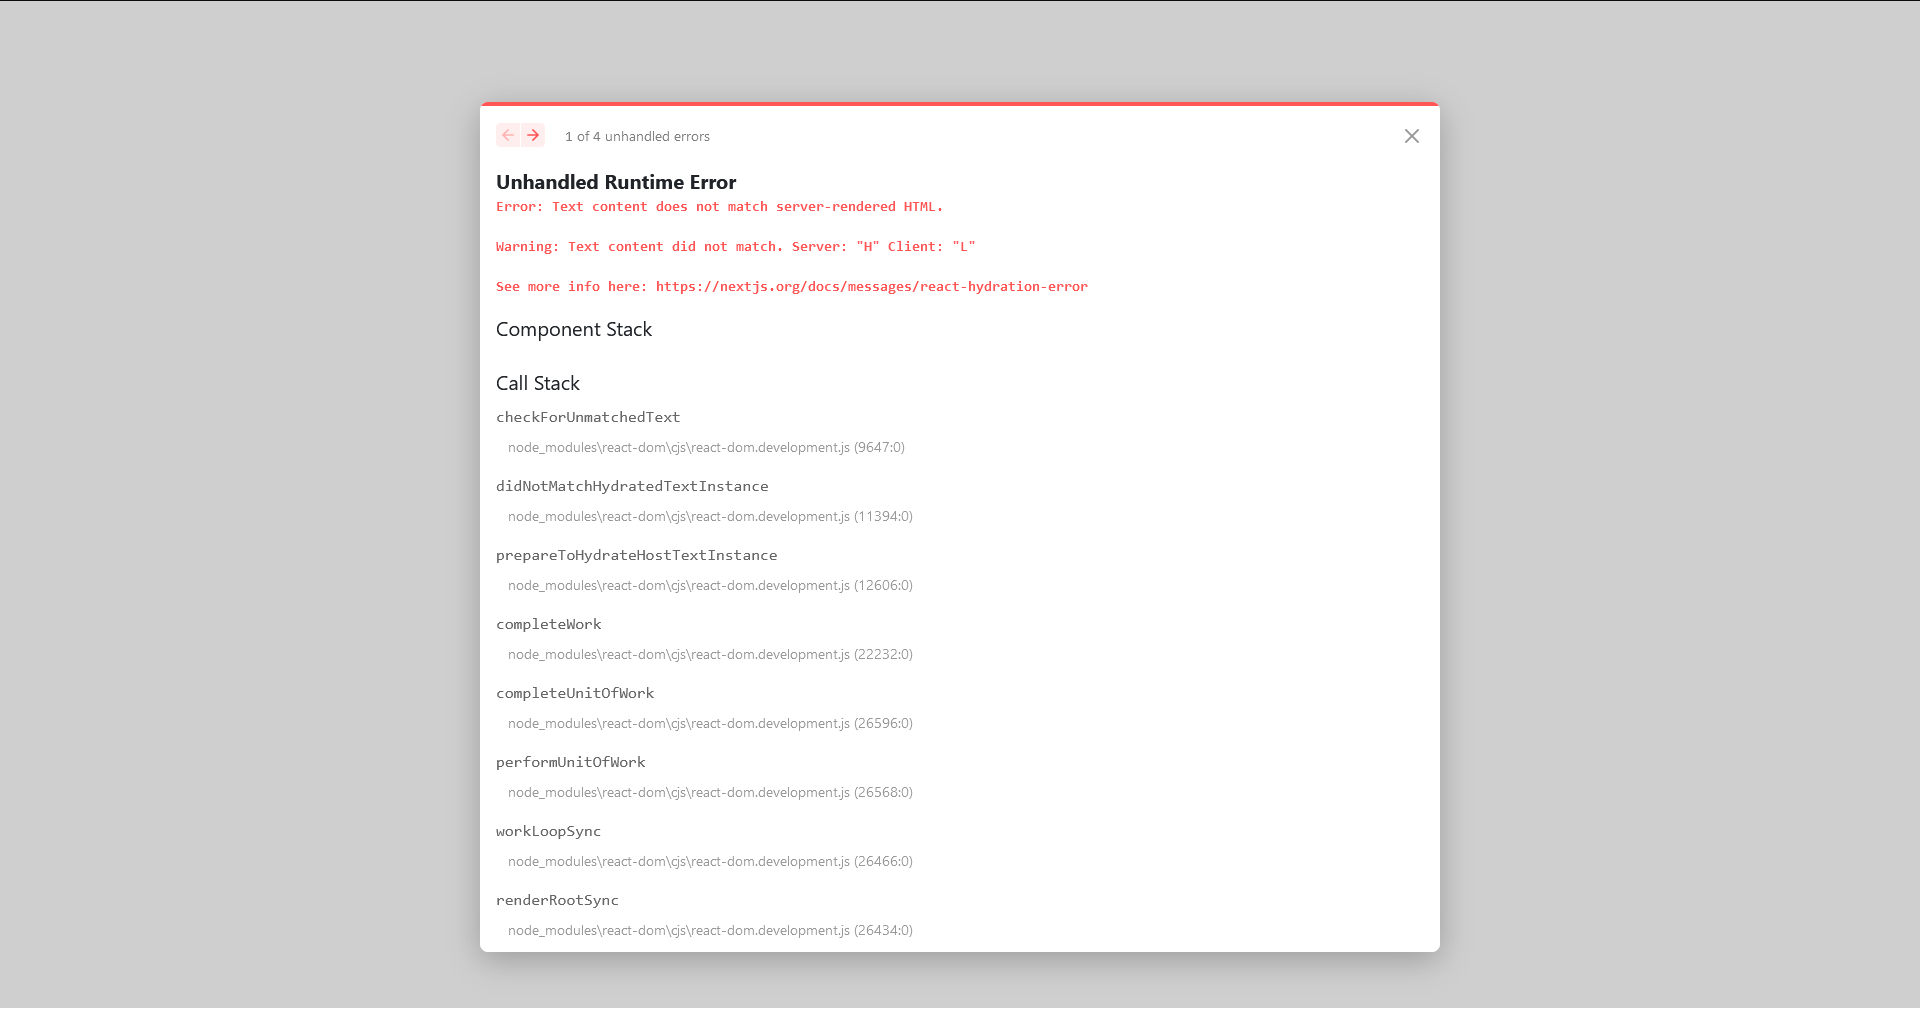
F*ck.
Next.js didn’t like that, and it’s a little confusing because rendering a random board worked fine before, so why not now? I was using a useEffect hook to generate the random board when the app rehydrated, which Next.js allows because it treats useEffect calls as supposed to run on the client and doesn’t execute them during server-side rendering. On the other hand, the state machine initialization isn’t wrapped in a useEffect hook, so it runs during the server-side render and the client-side rehydration, causing the difference that Next.js is complaining about.
A naive solution is to wrap the creation of the state machine in a useEffect somehow. But a more intelligent solution is implementing a feature we needed anyways: a title screen. So abandoning the implementation of the “chaining” and “idle”, we can repurpose our state machine to move from a “title” state and a “play” state:
createMachine({
initial: 'title',
states: {
title: {},
play: {},
},
context: {
currentWord: '',
board: generateRandomBoard(),
}
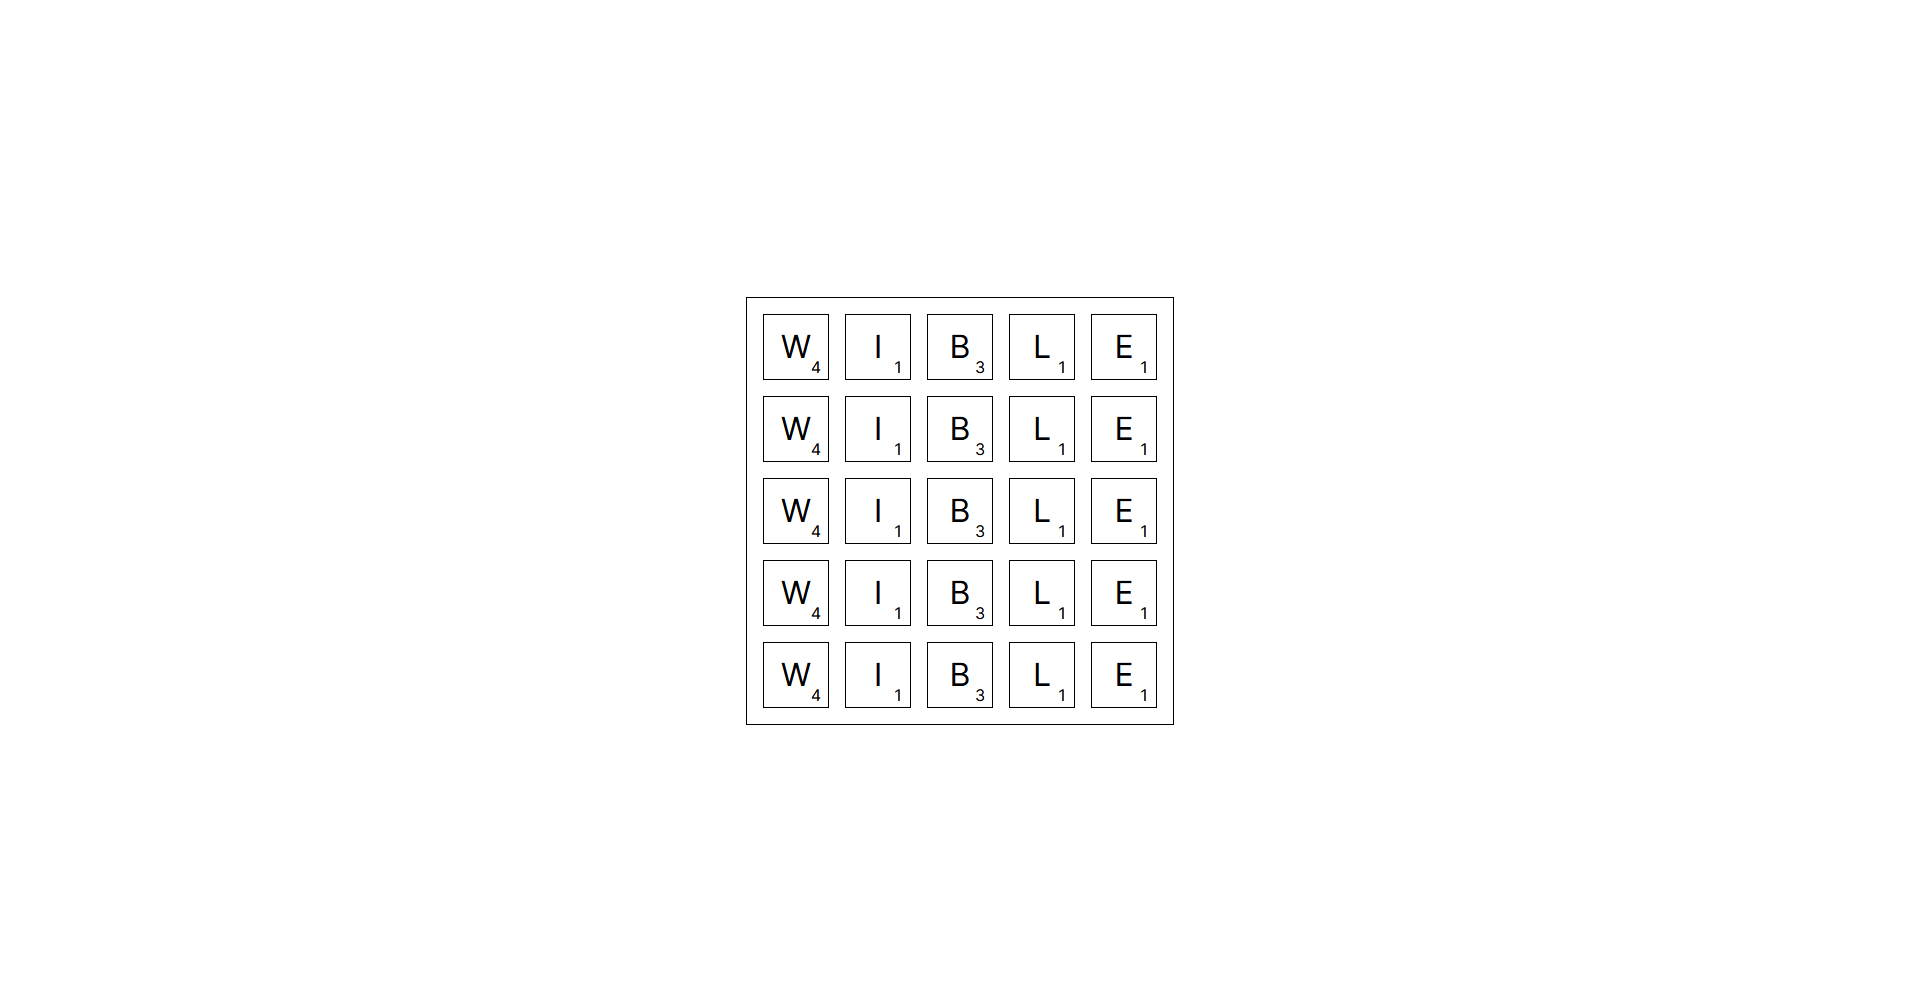
})And instead of generating a random board on initialization, we generate a title board. This title board will be the same every time we generate it, keeping Next.js happy. And instead of generating it when we pass the context, we’ll generate the sate machine enters the “title” state:
createMachine(
	{
		initial: 'title',
		states: {
			title: {
				entry: 'setupTitle',
			},
			play: {},
		},
		context: {
			currentWord: '',
			board: [],
		}
	},
	{
		actions: {
			setupTitle: assign({
	      currentWord: (_) => '',
	      board: (_) => generateTitleBoard()
	    }),
		}
	}
)
Here I use the XState notion of “actions.” When you create a state machine with XState, you can supply an options object describing several extensions for your state machine. In this case, I’m using the actions object that will allow me to give my state machine functions it can invoke. I use this to create a setupTitle action that clears the current word and sets the board to the title board. This action is executed whenever the machine enters the “title” state.
So if we check Wibble now, we see our title board:
But if I diagram the state machine, it still looks like this:

So when should Wibble transition from the “title” state to the “play” state? When the player tells it to:

To implement this in XState, all I have to write is this:
createMachine(
	{
		initial: 'title',
		states: {
			title: {
				entry: 'setupTitle',
				on: {
					START_GAME: 'play'
				}
			},
			play: {},
		},
		context: {
			currentWord: '',
			board: [],
		}
	},
	{
		actions: {
			setupTitle: assign({
	      currentWord: (_) => '',
	      board: (_) => generateTitleBoard()
	    }),
		}
	}
)
Notice the on field added to the “title” state. This defines our transitions and their behaviors. In this case, I tell the “title” state that when it receives an event labeled START_GAME, it should transition to the “play” state. In XState, an event is how you interact with a state machine from the larger application. When you use a state machine, for instance, with the useMachine hook, you are given three things: the current state, a send function, and a reference to the currently running machine.
The send function is how I’ll tell the state machine to change from the “title” to the “play” state:
const [state, send] = useMachine(stateMachine)

return (
  <main>
		{/* ... */}
    <button onClick={() => send('START_GAME')}>
      Play
    </button>
  </main>
)
But if we click this button, we don’t see anything happen:
I haven’t told XState that anything happens when we enter the “play” state. I can fix this by telling the “play” state to set the board to a randomly generated board on entry:
createMachine(
	{
		initial: 'title',
		states: {
			title: {
				entry: 'setupTitle',
				on: {
					START_GAME: 'play'
				}
			},
			play: {
				entry: 'setupGame',
			},
		},
		context: {
			currentWord: '',
			board: [],
		}
	},
	{
		actions: {
			setupTitle: assign({
	      currentWord: (_) => '',
	      board: (_) => generateTitleBoard()
	    }),
			setupGame: assign({
	      board: (_) => generateRandomBoard()
	    }),
		}
	}
)
Additionally, I’ll tell the game to remove the “Play” button when we aren’t in the “title” state:
state.matches('title')
? (
  <button onClick={() => actor.send('START_GAME')}>
    Play
  </button>
  )
: null
And if I try to click play again, we see that the play button disappears and the board changes:
Challenge 3: Allowing All Components to Talk to the State Machine
Currently, the state machine is only wired to the game's top-level component. But each tile is a component that needs to talk to the state machine since the tile component is what handles the mouse input and tells the game what character to append to the current word. Initially, I just invoked the useMachine hook and used the same send function as used to make the play button work.
However, there was a problem. The state machine wasn’t receiving the events to add letters to the current word. I spent a lot of time scratching my head before I realized what should have been readily apparent: useMachine creates a whole new state machine every time it is invoked. That meant that each tile was talking to its own, unique instance of the state machine!
It turns out that XState’s docs answered my trouble: use React Context to share a single state machine across many components. This also required two other hooks from the XState React bindings: useInterpret and useActor. This created code that looked like this:
const Wibble = () => {
	const actor = useInterpret(gameStateMachine)

	return (
		<GameStateMachineContext.Provider value={actor}>
		  <Game />
	  </GameStateMachineContext.Provider>
	)
}
const Game = () => {
	const actor = useContext(GameStateMachineContext)
	const [state] = useActor(actor)

	return (
		// Code that draws the board and button.
		// Instead of using `send` here, we can use `actor.send`.
	)
}
const Tile = ({ letter, score }) => {
	const actor = useContext(GameStateMachineContext)
	// We don't need the state in the Tiles, so we skip useActor.

	return (
		<div onClick={() => actor.send({ type: 'ADD_LETTER', letter })}>
			{letter}
			{/* ... */}
		</div>
	)
}
useInterpret is like useMachine, but instead of giving us access to the machine state and the send function, it only gives us a reference to the actor. This means that the top-level component will re-render only when the machine is created (or recreated). Then, in our game component, we retrieve this actor instance and call useActor, which gives us access to the state and the send function, though we don’t need that if we have the actor. Calling actor.send does the same thing as send from useMachine or useActor.
And what does our “add letter” event do? Well, I updated our state machine definition:
createMachine(
	{
		initial: 'title',
    states: {
      title: {
        entry: 'setupTitle',
        on: {
          START_GAME: 'play'
        }
      },
      play: {
        entry: 'setupGame',
        on: {
          ADD_LETTER: {
            actions: 'addLetter',
          }
        }
      }
    },
    context: {
      currentWord: '',
      board: []
    },
  },
  {
    actions: {
      setupTitle: assign({
        currentWord: (_) => '',
        board: (_) => generateTitleBoard()
      }),
      setupGame: assign({
        board: (_) => generateRandomBoard()
      }),
      addLetter: assign({
        currentWord: (context, event: { type: 'ADD_LETTER', letter: string }) =>
          context.currentWord + event.letter
      })
    }
  }
)
Here I gave the “play” state the instruction that whenever an “add letter” event is sent, it will invoke the addLetter action. This appends the letter sent as part of the event’s payload to the current word. Now when we run Wibble, we can start the game, get a random board, and click on random letters to create a word:
You can play with this version of Wibble here: https://wibble-day-2.vercel.app/. The code for this version can also be found on my GitHub.